Connect Google Firebase with Nodemcu ESP8266
Hello guys, I’m Senura Jayadeva. Today I’m going to show you, how to connect Google Firebase with Nodemcu.
Requirements
- Nodemcu ESP8266
- Firebase Account ( We are going to work with the firebase realtime database )
- Basic Knowledge about Arduino
What is Nodemcu ESP8266?
NodeMCU is an open-source platform, it’s hardware design is open for edit/modify/build. NodeMCU Dev Kit/board consist of ESP8266 wifi enabled chip. The ESP8266 is a low-cost Wi-Fi chip developed by Espressif Systems with TCP/IP protocol. It can be used for a wide variety of IoT applications.
Here I’m not going to explain how to install drivers & setup Arduino IDE for the Nodemcu ESP8266 board. If you have a problem with that please refer following links
Use esp8266 module in board manager > click “ESP-12E module”.
Install Arduino JSON Library
Make sure to install ArduinoJson version 5.13.5
Install Firebase Library
After installing the ArduinoJson library, we have to install the Firebase library to connect with the firebase.
you can download it from this link — https://github.com/FirebaseExtended/firebase-arduino/releases
choose v0.3 Bi-directional streaming support
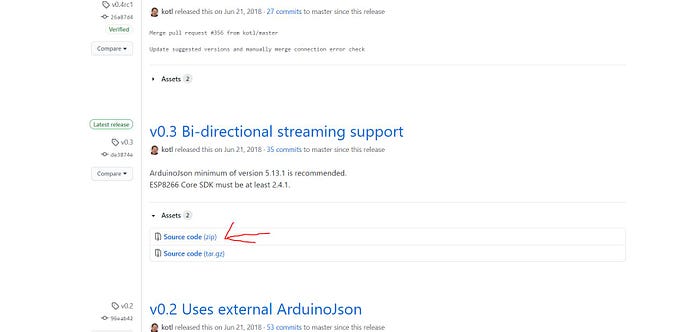
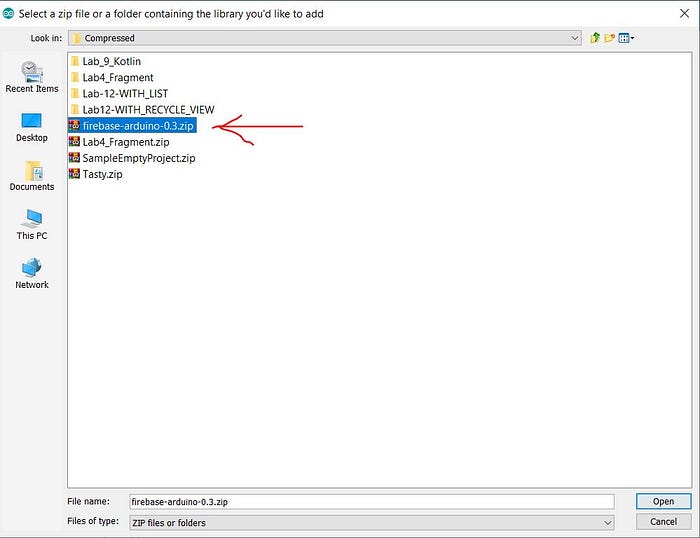
After downloading it go to Arduino IDE and go to Add .Zip library option and import the downloaded zip file

There is a small bug in this library. First, you have to fix this.
Go to C:\Users\Your PC Name\Documents\Arduino\libraries\firebase-arduino-0.3\src
Here you will see a file called FirebaseHttpClient.h
Open that file and change the fingerprint code as mentioned below.
03 D6 42 23 03 D1 0C 06 73 F7 E2 BD 29 47 13 C3 22 71 37 1B
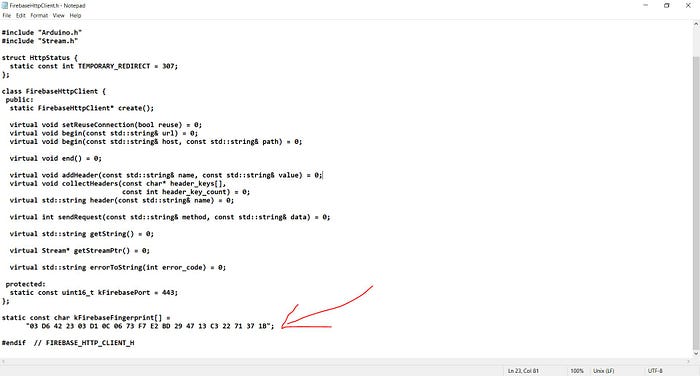
Make sure to fix this otherwise you will not connect with the firebase
I used the website https://www.grc.com/fingerprints.htm
and type in “test.firebaseio.com” and got the new fingerprint.
Create a Real-Time Database on Firebase
Now go to firebase and create a project.
- First, click on Go to console
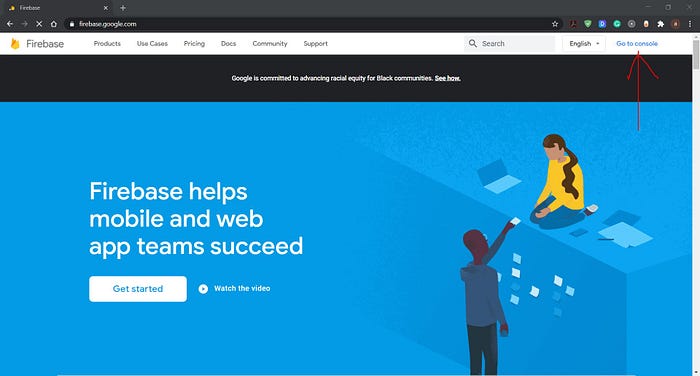
2. Click on Add Project

3. Give a name for the project
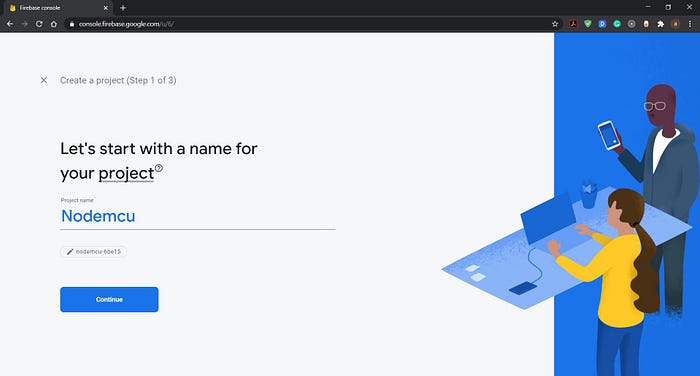


After creating a project you will see an interface like below.
The next thing we have to do is create a real-time database. For that, you can see an option called Realtime Database on the left sidebar. Click on that and then click on the Create Database.
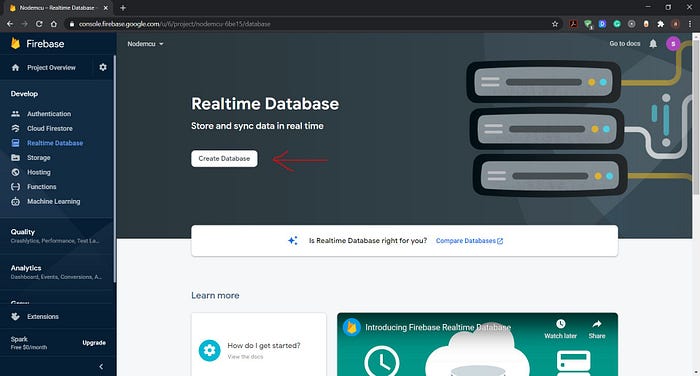
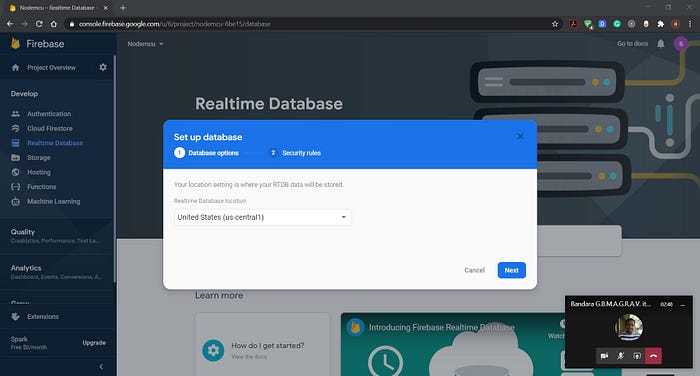
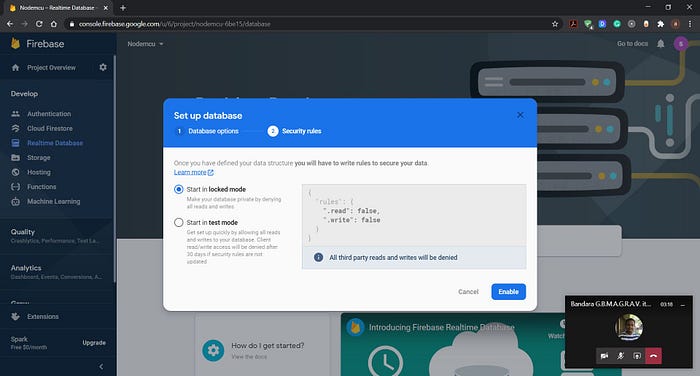
Then we have to do some modifications. Go to Rules and change the read and write as true. Finally, publish those changes.

Now go to Arduino IDE and copy the following code
#include <ESP8266WiFi.h>
#include <SoftwareSerial.h>
#include <FirebaseArduino.h>
#include <ArduinoJson.h>
#include <ESP8266HTTPClient.h>

// Set these to run example.
#define FIREBASE_HOST “nodemcu-xxxxx-xxxxx-xxxx.firebaseio.com”
#define FIREBASE_AUTH “xGJVxxxxxxxxxxxxxxxxxxxxxxxxxxxxxxxxxxZz”
#define WIFI_SSID “Nokia 5” //provide ssid (wifi name)
#define WIFI_PASSWORD “xxxxxxxxx” //wifi passwordvoid setup()
{

 // Debug console
 Serial.begin(9600);// connect to wifi.
 WiFi.begin(WIFI_SSID, WIFI_PASSWORD);
 Serial.print(“connecting”);
 while (WiFi.status() != WL_CONNECTED)
 {
 Serial.print(“.”);
 delay(500);
 }
 Serial.println();
 Serial.print(“connected: “);
 Serial.println(WiFi.localIP());

 Firebase.begin(FIREBASE_HOST, FIREBASE_AUTH);if(Firebase.failed())
 {
 Serial.print(Firebase.error());
 }
 else{

 Serial.print(“Firebase Connected”);
 Firebase.setString(“Senura/Value”,”0");
 }}

void loop()
{for(int i = 0; i <= 100; i++)
 {
    Firebase.setInt(“/Senura/Value”,i);
    delay(1000);
 }

}
Here you can see a word called FIREBASE_HOST. You can find it from the Realtime Database.
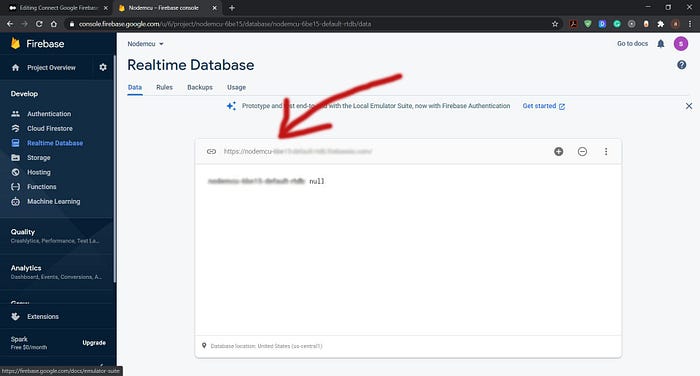
Make sure to set the FIREBASE_HOST without “ https:// ” part.
Instead of https://nodemcu-XXXXX-XXXXX-rtdb.firebaseio.com use nodemcu-XXXXX-XXXXX-rtdb.firebaseio.com
Next, you have to set the FIREBASE_AUTH. To get that, go to project settings and click on the Service accounts. Then go to Database secrets. There you can see the key for FIREBASE_AUTH.
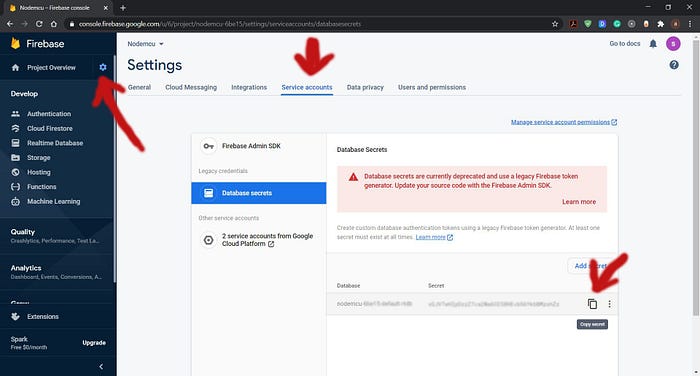
After setting FIREBASE_HOST and FIREBASE_AUTH we have to set the WIFI_SSID and WIFI_PASSWORD.
WIFI_SSID means your wifi name.
After setting all those details your code will look like this.
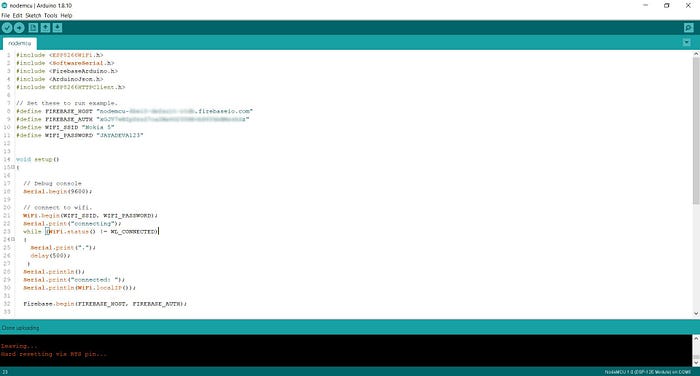
Testing
Connect your NodeMCU ESP8266 with your personal computer via standard USB cable and upload code in it. While uploading the code into NodeMCU, the device continuously blinks.
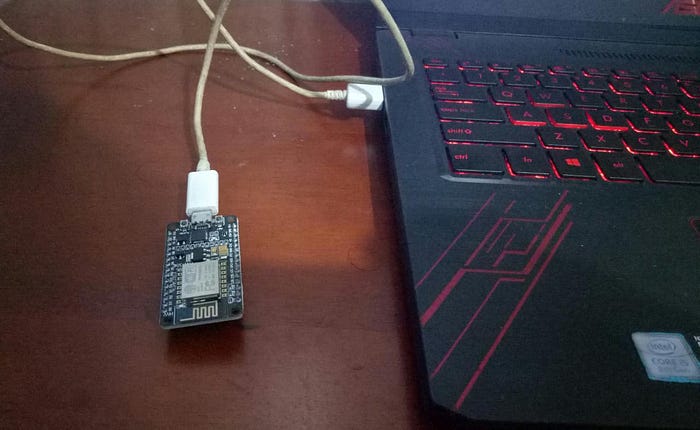
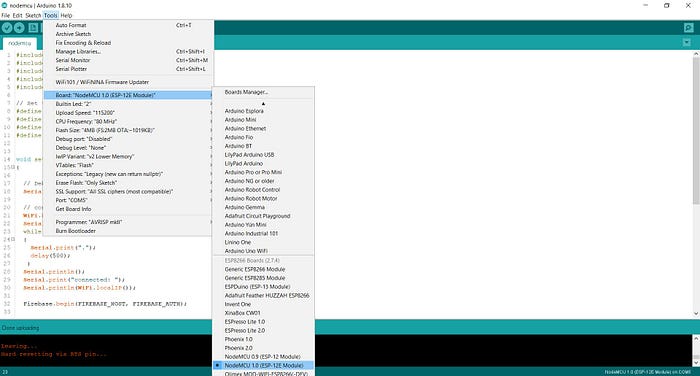
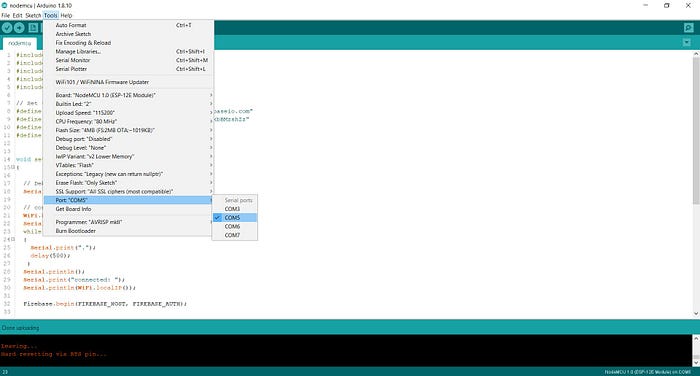
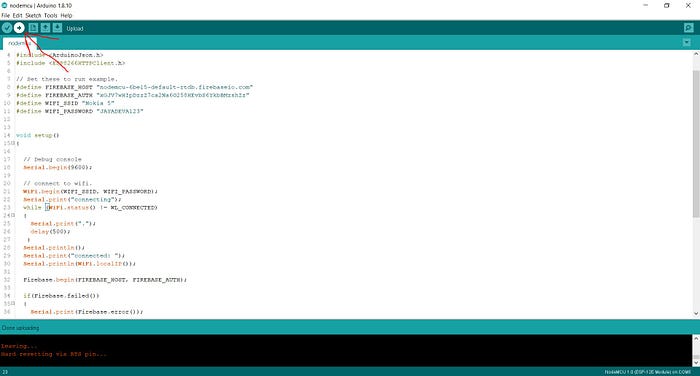
Now open the serial monitor form Tools, you will find data are uploaded to the Firebase database.
Make sure to choose the baud rate as 9600 in the menu at the bottom right corner of its screen
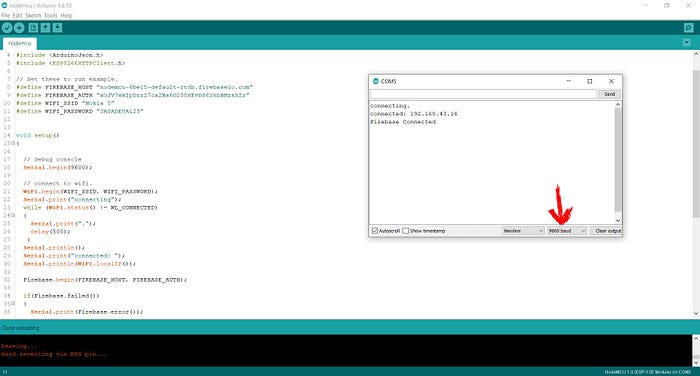
Now open the firebase real-time database and check. You will able to see it's changing the value after 1 second.

This is all about connecting firebase with Nodemcu. Hope you learned something. Thank You!.


